Live Commentary
By:
Jake Boxall-Legge


Want to know more? Check out our top F1 stories
How will Monaco’s new ‘two-stop’ rule play out?
In a new twist for 2025, all drivers must use three sets of tyres in the Monaco GP (for clarification, this does not mean all three compounds). Without safety cars, this would mean that all teams would be required to perform two conventional stops.
In the event of a red flag, changing tyres here would fulfil the brief. And then there’s the effect of safety cars, VSCs…there’s opportunities to get relatively cheap tyre stops here.
So is it worth the early gamble for a backmarker? Probably; if there’s no first-corner pile-up (like we saw in F2 earlier) then they could go for it. But the leaders will remain in lock-step, and it will depend on what Norris does at the start.
Andrea Kimi Antonelli, Mercedes
Photo by: Zak Mauger / Motorsport Images via Getty Images
Post-qualifying penalties and starting grid
As we said earlier, Lewis Hamilton was given a three-place penalty for impeding Max Verstappen in qualifying, and starts from seventh.
Lance Stroll collected two separate penalties – a one-place drop for causing contact with Charles Leclerc in FP1, and a three-place drop for impeding Gasly in Q1. This moves him from 19th to…well, 19th.
Bearman received a 10-place grid drop for overtaking Sainz under a red flag in FP2, and thus starts last.
Starting grid for the Monaco GP
–
|
1
– 2
|
|||||||||||||||||||||||||||||||||||||||||||||||||||||||||||||||||||||||||||||||||||||||||||||||||||
|---|---|---|---|---|---|---|---|---|---|---|---|---|---|---|---|---|---|---|---|---|---|---|---|---|---|---|---|---|---|---|---|---|---|---|---|---|---|---|---|---|---|---|---|---|---|---|---|---|---|---|---|---|---|---|---|---|---|---|---|---|---|---|---|---|---|---|---|---|---|---|---|---|---|---|---|---|---|---|---|---|---|---|---|---|---|---|---|---|---|---|---|---|---|---|---|---|---|---|---|
| Cla | Driver | # | Chassis | Engine | Time | Tyres | km/h | ||||||||||||||||||||||||||||||||||||||||||||||||||||||||||||||||||||||||||||||||||||||||||||
| 1 | 4 |  |
McLaren | Mercedes |
1’09.954 |
171.729 | |||||||||||||||||||||||||||||||||||||||||||||||||||||||||||||||||||||||||||||||||||||||||||||
| 2 | 16 |  |
Ferrari | Ferrari |
+0.109 1’10.063 |
171.462 | |||||||||||||||||||||||||||||||||||||||||||||||||||||||||||||||||||||||||||||||||||||||||||||
| 3 | 81 |  |
McLaren | Mercedes |
+0.175 1’10.129 |
171.301 | |||||||||||||||||||||||||||||||||||||||||||||||||||||||||||||||||||||||||||||||||||||||||||||
| 4 | 1 |  |
Red Bull | Red Bull |
+0.715 1’10.669 |
169.992 | |||||||||||||||||||||||||||||||||||||||||||||||||||||||||||||||||||||||||||||||||||||||||||||
| 5 | 6 |  |
RB | Honda |
+0.969 1’10.923 |
169.383 | |||||||||||||||||||||||||||||||||||||||||||||||||||||||||||||||||||||||||||||||||||||||||||||
| 6 | 14 |  |
Aston Martin | Mercedes |
+0.970 1’10.924 |
169.381 | |||||||||||||||||||||||||||||||||||||||||||||||||||||||||||||||||||||||||||||||||||||||||||||
| 7 | 44 |  |
Ferrari | Ferrari |
+0.428 1’10.382 |
170.685 | |||||||||||||||||||||||||||||||||||||||||||||||||||||||||||||||||||||||||||||||||||||||||||||
| 8 | 31 |  |
Haas | Ferrari |
+0.988 1’10.942 |
169.338 | |||||||||||||||||||||||||||||||||||||||||||||||||||||||||||||||||||||||||||||||||||||||||||||
| 9 | 30 |  |
RB | Honda |
+1.175 1’11.129 |
168.893 | |||||||||||||||||||||||||||||||||||||||||||||||||||||||||||||||||||||||||||||||||||||||||||||
| 10 | 23 |  |
Williams | Mercedes |
+1.259 1’11.213 |
168.693 | |||||||||||||||||||||||||||||||||||||||||||||||||||||||||||||||||||||||||||||||||||||||||||||
| 11 | 55 |  |
Williams | Mercedes |
+1.408 1’11.362 |
168.341 | |||||||||||||||||||||||||||||||||||||||||||||||||||||||||||||||||||||||||||||||||||||||||||||
| 12 | 22 | |
Red Bull | Red Bull |
+1.461 1’11.415 |
168.216 | |||||||||||||||||||||||||||||||||||||||||||||||||||||||||||||||||||||||||||||||||||||||||||||
| 13 | 27 |  |
Sauber | Ferrari |
+1.642 1’11.596 |
167.791 | |||||||||||||||||||||||||||||||||||||||||||||||||||||||||||||||||||||||||||||||||||||||||||||
| 14 | 63 |  |
Mercedes | Mercedes |
|
||||||||||||||||||||||||||||||||||||||||||||||||||||||||||||||||||||||||||||||||||||||||||||||
| 15 | 12 |  |
Mercedes | Mercedes |
|
||||||||||||||||||||||||||||||||||||||||||||||||||||||||||||||||||||||||||||||||||||||||||||||
| 16 | 5 |  |
Sauber | Ferrari |
+1.948 1’11.902 |
167.077 | |||||||||||||||||||||||||||||||||||||||||||||||||||||||||||||||||||||||||||||||||||||||||||||
| 17 | 10 |  |
Alpine | Renault |
+2.040 1’11.994 |
166.863 | |||||||||||||||||||||||||||||||||||||||||||||||||||||||||||||||||||||||||||||||||||||||||||||
| 18 | 43 |  |
Alpine | Renault |
+2.643 1’12.597 |
165.477 | |||||||||||||||||||||||||||||||||||||||||||||||||||||||||||||||||||||||||||||||||||||||||||||
| 19 | 18 |  |
Aston Martin | Mercedes |
+2.609 1’12.563 |
165.555 | |||||||||||||||||||||||||||||||||||||||||||||||||||||||||||||||||||||||||||||||||||||||||||||
| 20 | 87 |  |
Haas | Ferrari |
+2.025 1’11.979 |
166.898 | |||||||||||||||||||||||||||||||||||||||||||||||||||||||||||||||||||||||||||||||||||||||||||||
| View full results | |||||||||||||||||||||||||||||||||||||||||||||||||||||||||||||||||||||||||||||||||||||||||||||||||||
GPS analysis: Norris’ pole lap
How did Norris overturn Leclerc’s margin at the final moment? We’ve taken a look at the data across his lap.
Analysis: How Norris beat Leclerc to pole for F1’s Monaco GP
Formula 1’s most anticipated qualifying of the season delivered with a thrilling battle for pole position between Lando Norris and Charles Leclerc. Here’s how the tussle swung between the pair and why the McLaren driver came out on top
[wpcc-element _tag=”source” srcset=”//cdn.motorsport.com/images/mgl/24vxWBg6/s200/lando-norris-mclaren.webp 200w, //cdn.motorsport.com/images/mgl/24vxWBg6/s300/lando-norris-mclaren.webp 300w, //cdn.motorsport.com/images/mgl/24vxWBg6/s400/lando-norris-mclaren.webp 400w, //cdn.motorsport.com/images/mgl/24vxWBg6/s500/lando-norris-mclaren.webp 500w, //cdn.motorsport.com/images/mgl/24vxWBg6/s600/lando-norris-mclaren.webp 600w, //cdn.motorsport.com/images/mgl/24vxWBg6/s700/lando-norris-mclaren.webp 700w, //cdn.motorsport.com/images/mgl/24vxWBg6/s800/lando-norris-mclaren.webp 800w, //cdn.motorsport.com/images/mgl/24vxWBg6/s900/lando-norris-mclaren.webp 900w, //cdn.motorsport.com/images/mgl/24vxWBg6/s1000/lando-norris-mclaren.webp 1000w, //cdn.motorsport.com/images/mgl/24vxWBg6/s1100/lando-norris-mclaren.webp 1100w, //cdn.motorsport.com/images/mgl/24vxWBg6/s1200/lando-norris-mclaren.webp 1200w” type=”image/webp” sizes=”(min-width: 650px) 700px” _close=”0″]
Monaco GP qualifying recap
Q1: Charles Leclerc was quickest in the opening session, which ended earlier than expected when Andrea Kimi Antonelli put his Mercedes into the wall at the Nouvelle Chicane.
Bortoleto was denied a Q2 appearance at the last minute by Hadjar, as Bearman (encumbered with a 10-place penalty), Gasly, Stroll, and Colapinto went out.
Andrea Kimi Antonelli, Mercedes
Photo by: Andy Hone / Motorsport Images
Q2: Both Mercedes drivers took an early bath as George Russell’s electrics packed up and the Briton came to a stop in the tunnel.
This left three relegation spots, which was occupied by Sainz (who was unable to improve late on softs), Tsunoda (in the old-spec Red Bull) and Hulkenberg. Norris headed the session over Leclerc by 0.011s.
Q3: Lando Norris struck at the death of the session to snatch pole from Leclerc by 0.109s. The two McLarens chose to double-stint their second set of soft tyres at the end of the session, and thus went out early.
Norris set a 1m10.125s benchmark, but Leclerc followed this up with a 1m10.063s to take provisional pole. After a cooldown lap, Norris went again – breaking the track record to do a 1m09.954s.
Piastri placed third on the grid, while Verstappen moved up to fourth when Hamilton was penalised post-session for impeding the Dutchman.
Charles Leclerc, Ferrari, Lando Norris, McLaren, Oscar Piastri, McLaren
Photo by: Glenn Dunbar / Motorsport Images
F1 Monaco Grand Prix at 2pm BST/3pm local
Max Verstappen, Red Bull Racing
Photo by: Sam Bagnall / Motorsport Images via Getty Images
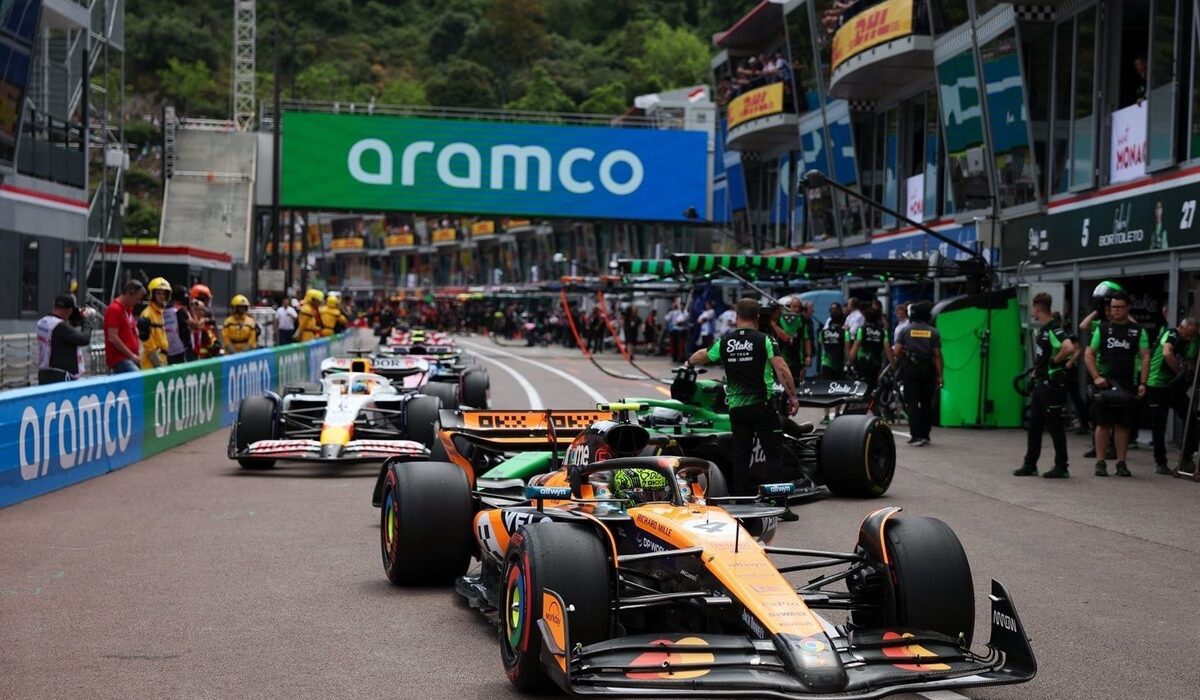
Hello everyone, and thanks for joining us – in just over an hour’s time, Monaco will roar into life as 20 F1 cars get the lights-out and pounce out of their grid boxes.
And there should be a lot to unpick as we go along – sans safety cars, everyone will have to do two stops, so expect some wild strategies from those towards the back. We’re excited, and we hope you are too!